
 MailMaestro pricing
 TeamsMaestro pricing






How to use TeamsMaestro webhooks to automate your meeting workflows
Your meeting ends, but the work it creates is just beginning. With TeamsMaestro webhooks, you can automatically send meeting summaries, transcripts, and action items to the tools your team already uses, helping everyone move from conversation to action faster.
In this guide, you’ll learn how webhooks work, how to set them up in TeamsMaestro, how to filter what gets sent, and how to verify each delivery. At the end, we’ll also walk through a practical example of automatically sending every client call to Notion using Zapier webhooks.
What is a webhook?
A webhook is a way for one application to notify another the moment something happens, no manual checking required.
Most integrations work the opposite way: you open an app, navigate to the right place, and enter information yourself, often checking back repeatedly to see if anything has changed. Webhooks invert this model. Instead of your tools pulling information, TeamsMaestro pushes it to them automatically.
In practice, this means providing TeamsMaestro with a URL. When a meeting ends, TeamsMaestro sends the relevant details—title, attendees, duration, and summary—directly to that address in real time. From there, the receiving system determines what to do with the information, whether that's logging it, triggering a workflow, or alerting a team.
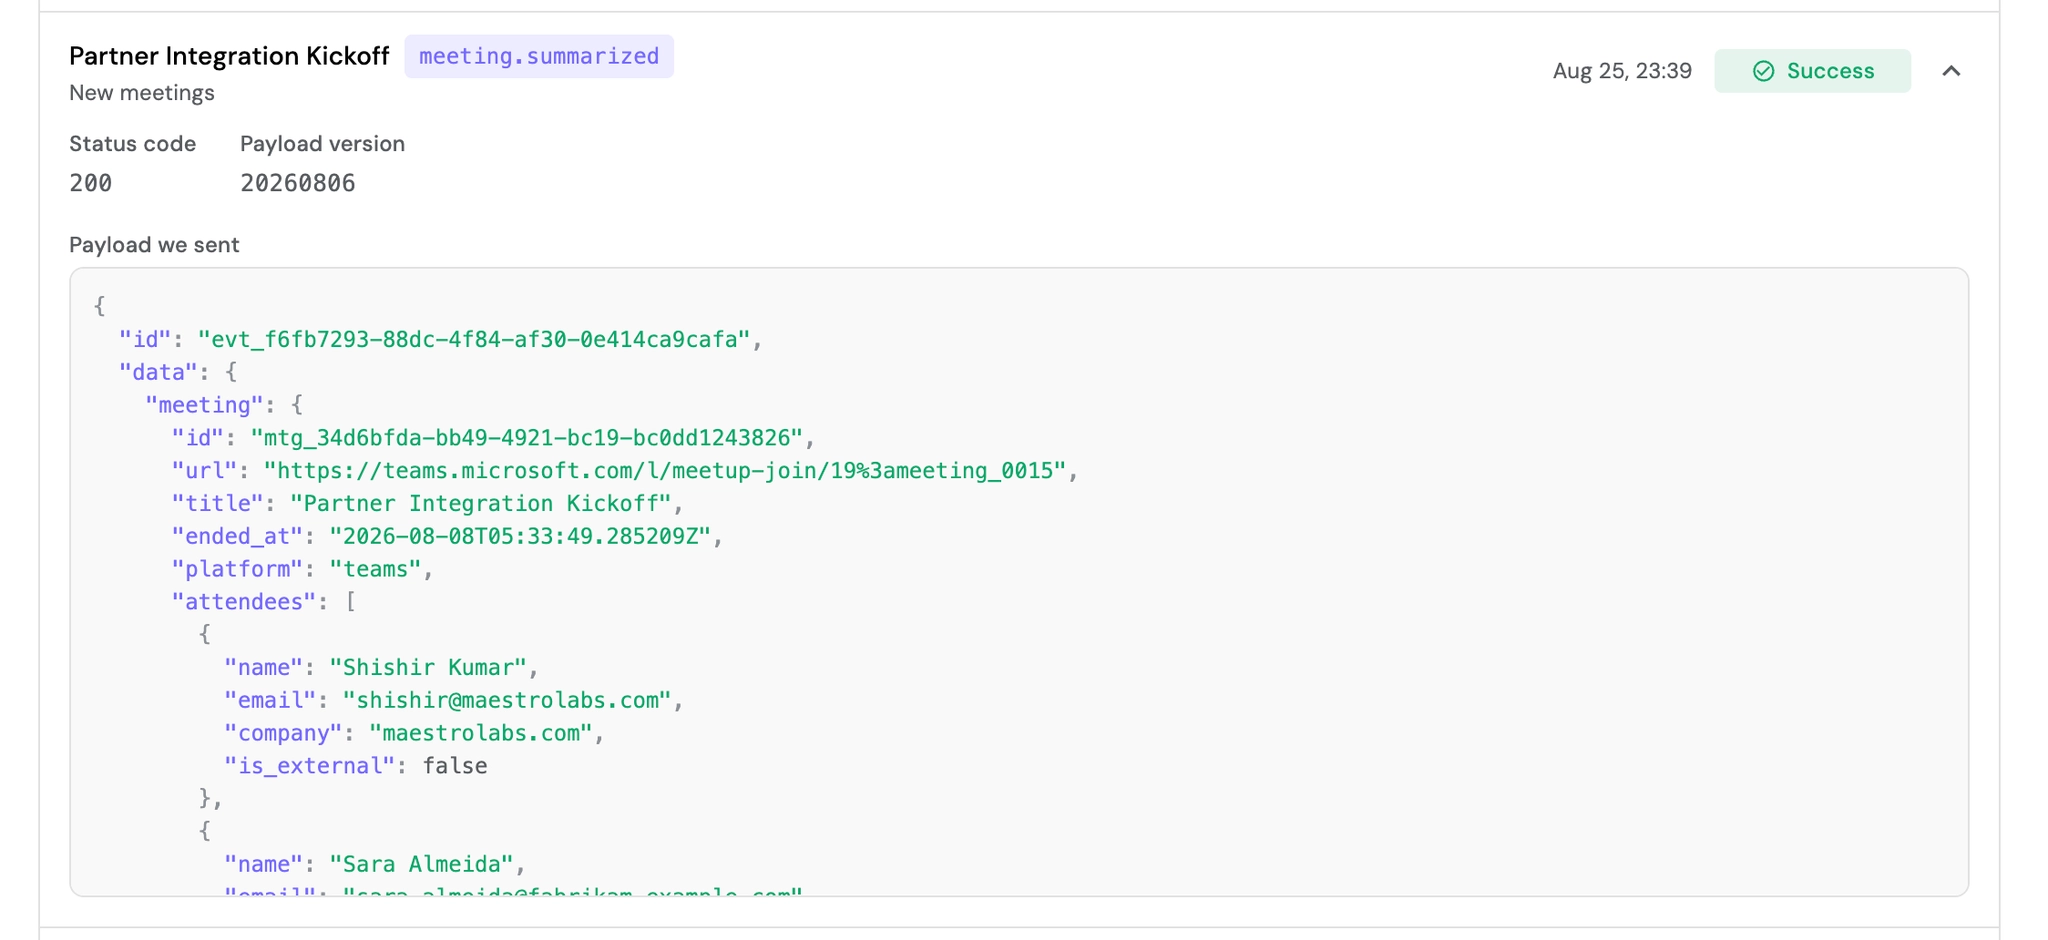
This is how we send data for your meetings to your endpoint once you setup a webhook for your account.
What people actually use them for
- Notes filed automatically — every call becomes a page in Notion, Confluence or Google Docs
- The team kept in the loop — a summary posts to Slack the moment a client call ends
- A CRM that stays current — call notes attach themselves to the right contact in HubSpot or Salesforce
- Follow-ups that don't get forgotten — action items become tasks in Asana, Trello or Linear
- A record you can search — every meeting logged as a row in a spreadsheet
No developer required. Tools like Zapier and Power Automate sit between TeamsMaestro and your other apps and handle the wiring for you, which is exactly how the example at the end of this guide is built.
Creating your first webhook
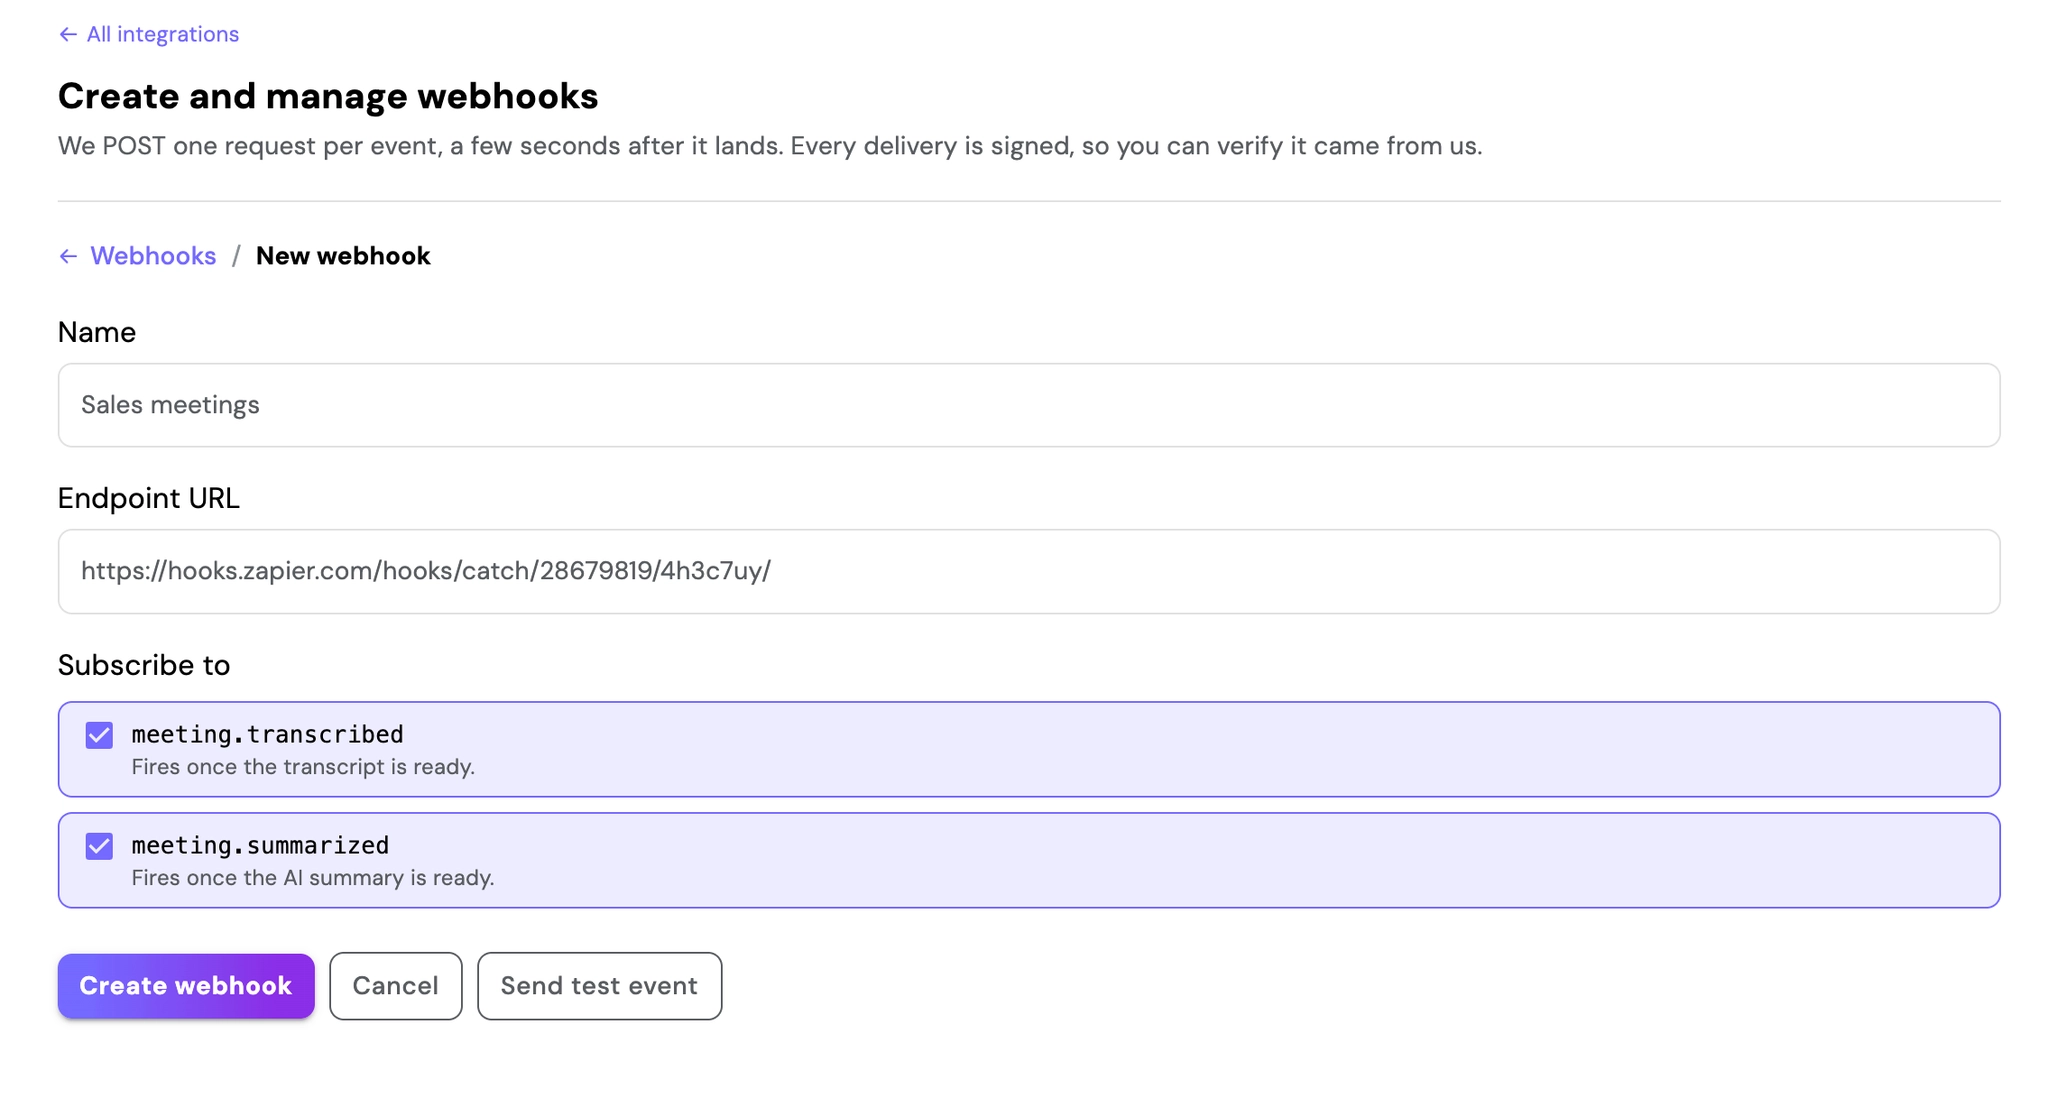
Everything lives in one place: Settings → Integrations → Webhook. Click Add webhook to open a short form. Here's what each field means.
1) Name your webhook
This label is for your own reference. Once you have multiple webhooks configured, a clear name, "Notion meeting notes or Slack client alerts," makes it far easier to identify each one of them.
2) Add the endpoint URL
The endpoint URL is the address TeamsMaestro delivers to. You won't need to create this yourself because the receiving tool provides it. In Zapier, it's the link generated by the webhook trigger; in Power Automate, it comes from your flow; if your engineering team is building a custom integration, they'll supply one from your own systems. Every endpoint URL begins with https://.
Worth double-checking: Copy and paste the full URL rather than typing it manually. A single missing character is the most common cause of failed deliveries, and it's easy to miss on a visual check.
3) Choose what to subscribe to
Under Subscribe to, select which events should trigger a delivery. There are two, firing at different points after a meeting ends:
For written-up notes, select Meeting Summarized. Selecting both will send two separate deliveries per meeting. This is useful if you want the transcript and the summary routed to different destinations, but worth knowing in advance so it doesn't produce unexpected duplicate entries.
4) Save and test
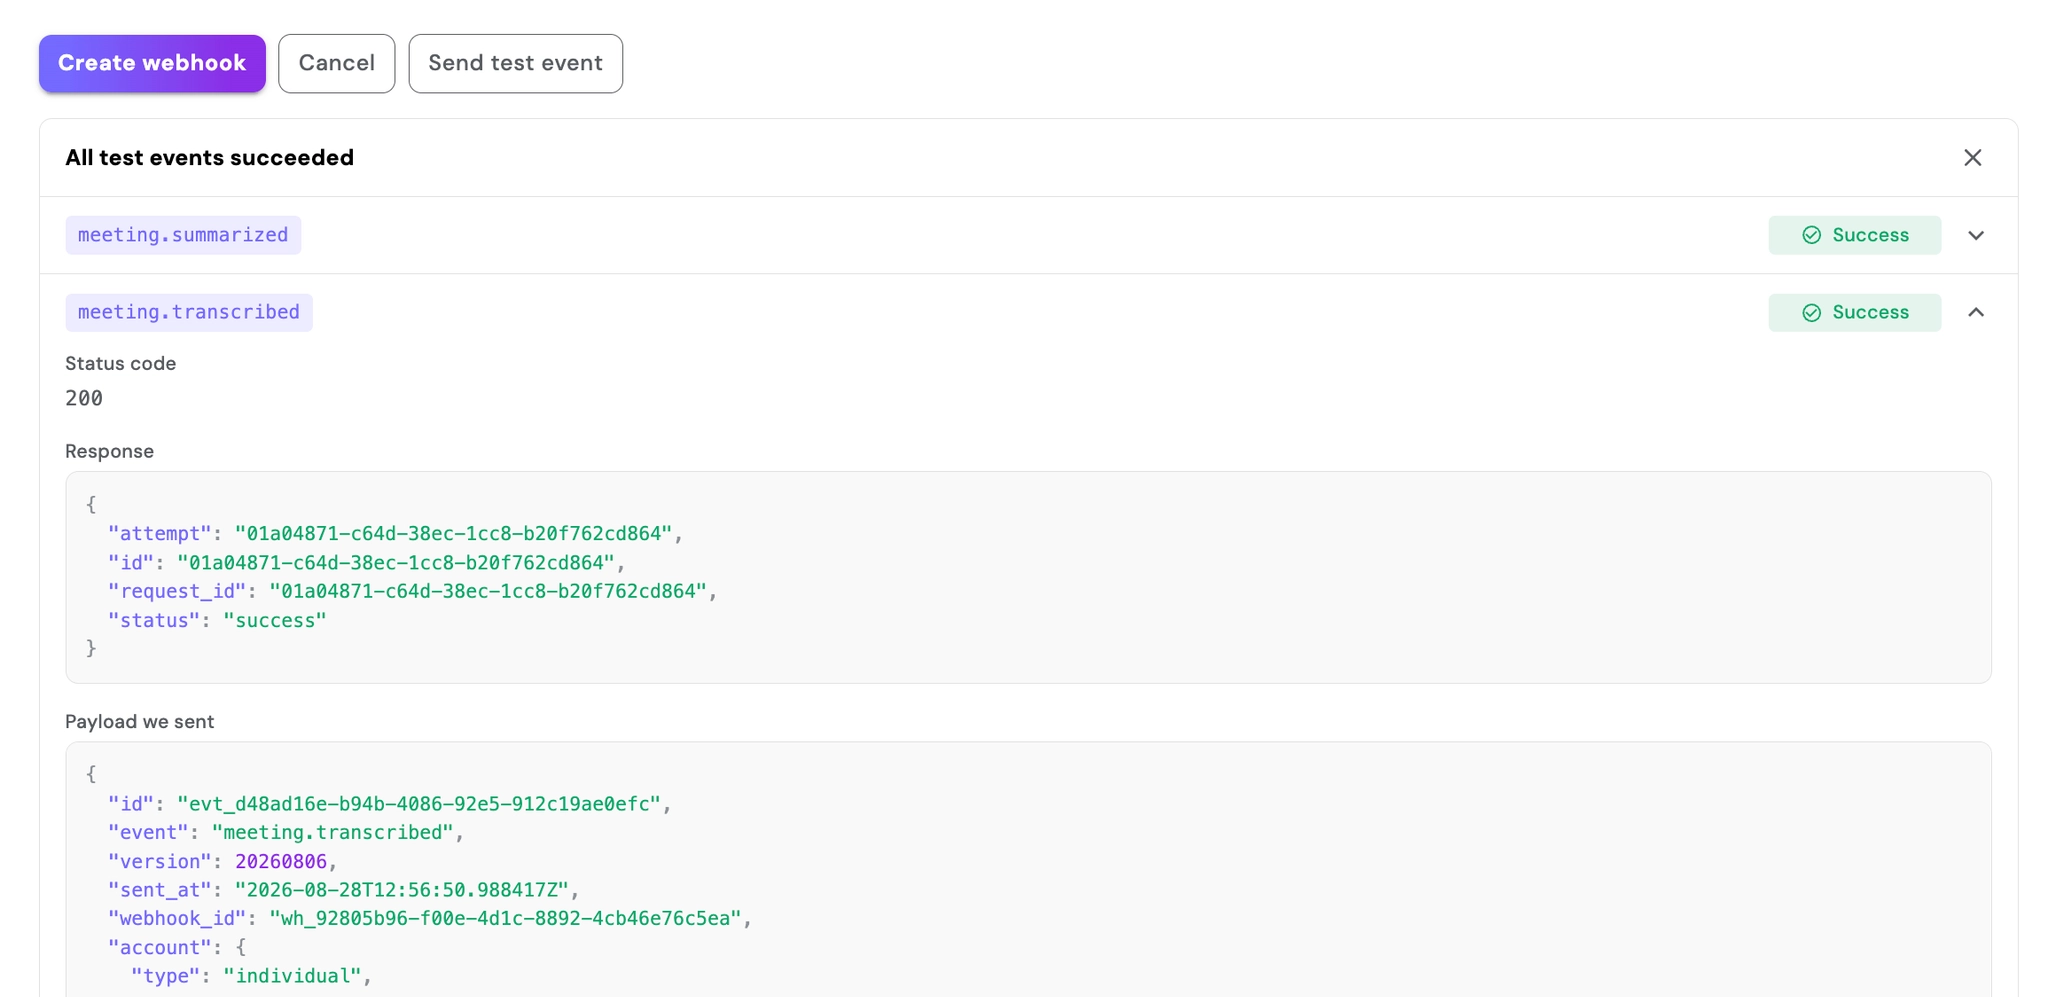
Rather than waiting for a live meeting to confirm the setup works, click Send test event. TeamsMaestro immediately sends a realistic, sample meeting to your endpoint, matching the structure of a real delivery, populated with placeholder content. You'll see Test event succeeded if it arrives correctly, or a clear explanation if it doesn't.
Filtering for the meetings that matter
By default, a webhook fires for every meeting TeamsMaestro processes—a weekly stand-up as readily as a major client call. This can quickly generate more noise than signal, and integrations that feel noisy tend to get disabled.
Filters solve this by setting plain-language conditions a meeting must meet before a delivery is sent. Three filter types are available:
- Meeting title - contains, starts with, or is exactly, useful for prefixed calls such as "Discovery:" or "lead"
- Meeting host - contains / not contains a defined list of people, for isolating meetings you personally ran
- Participants - contains / not contains, based on who actually attended

Reviewing delivery history
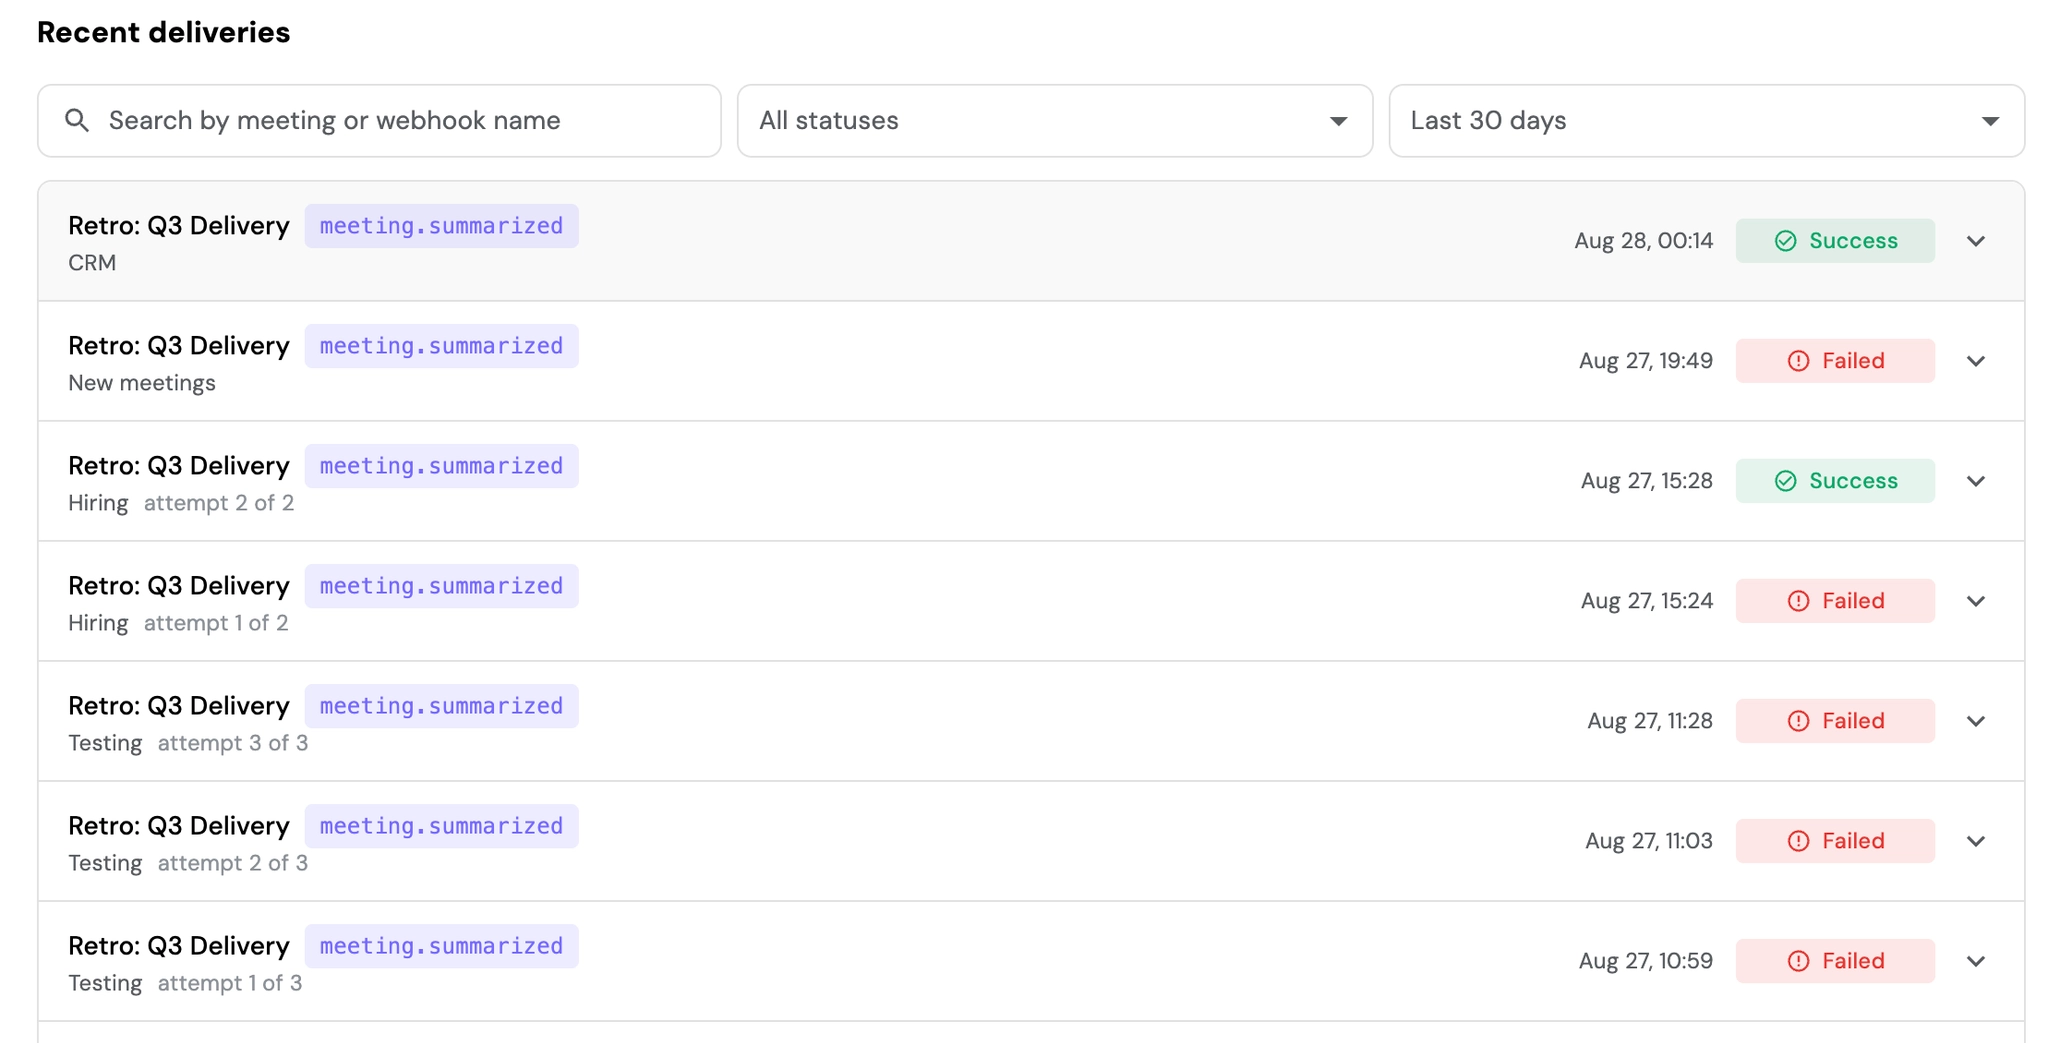
After each meeting, you can confirm exactly what was sent. Open your webhook under Settings → Integrations → Webhook and review Recent deliveries.
Every delivery is logged with its event type, timestamp, status, response, and exact payload, making it easy to verify delivery. If a delivery fails, TeamsMaestro automatically retries several times. Persistent failures remain visible with error details for quick diagnosis and resolution.
Example: Connecting your meeting notes to Notion with Zapier
What we'll build: When a call ends, TeamsMaestro generates a summary, and Zapier automatically creates a Notion page with the title, attendees, timing, and full write-up filled in - no manual entry, and internal meetings excluded.
This walkthrough uses Zapier as the connector between TeamsMaestro and Notion, no code required. You’ll need Zapier's premium account for this, and you'll also need a Notion account with a page or database to write into.
1) Get an address from Zapier
We start in Zapier, since TeamsMaestro needs a destination to deliver to, and this step creates it.
- In Zapier, click Create to start a new Zap.
- For the trigger app, select Webhooks by Zapier.
- For the event, select Catch Raw Hook.
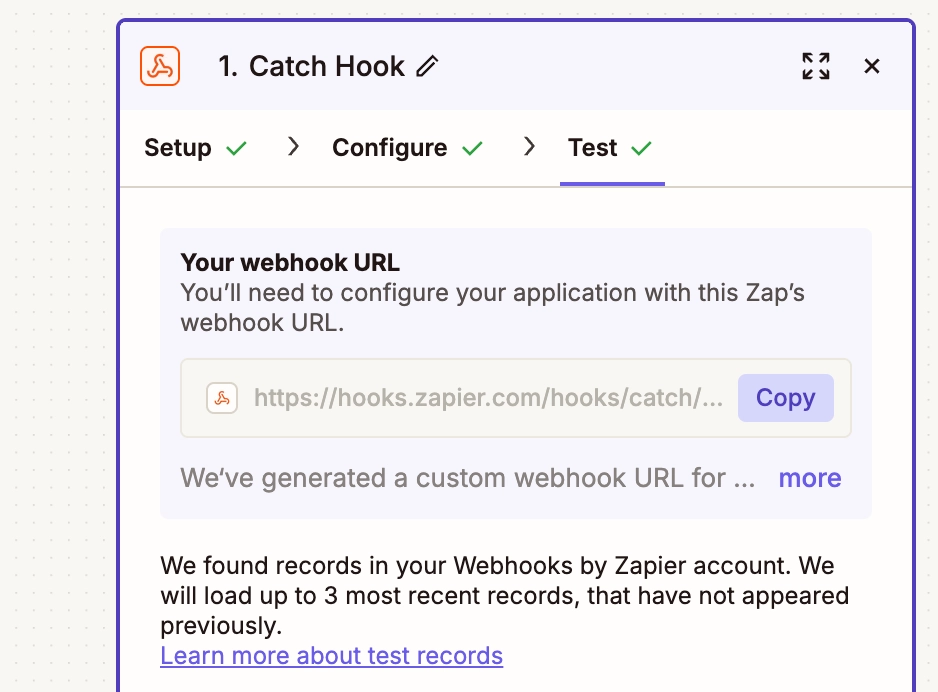
- Zapier generates a URL beginning with
https://hooks.zapier.com/— copy it. - Leave the tab open. Zapier will wait for the first delivery to arrive.
2) Point TeamsMaestro at it
In TeamsMaestro, create a webhook following the earlier steps: a recognizable name, the Zapier link as the endpoint URL, and Meeting Summarized as the event.
Add the filter from the previous section if required
Save the webhook, then click Send test event.


3) Confirm Zapier receives the data
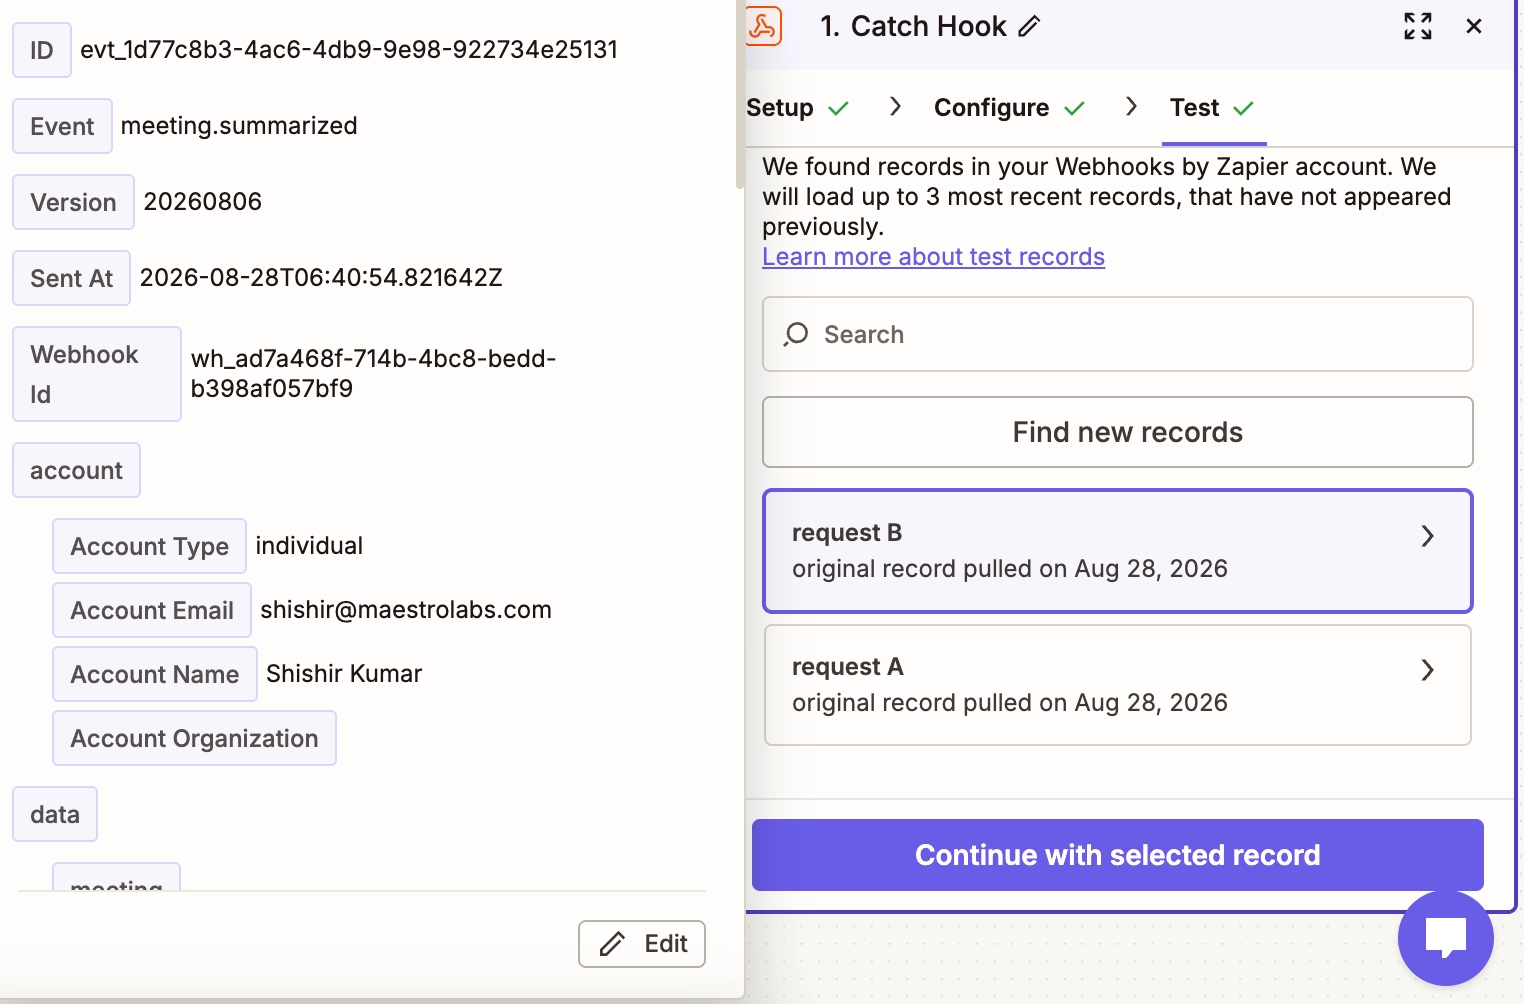
In Zapier, test the trigger. It will display the data just received: meeting title, organizer, attendees, start and end times, and the summary itself.
These are the fields you'll map into Notion in the next step. If Zapier indicates it's still waiting, send the test event again—it only listens while actively watching for a delivery.
4) Create the Notion page
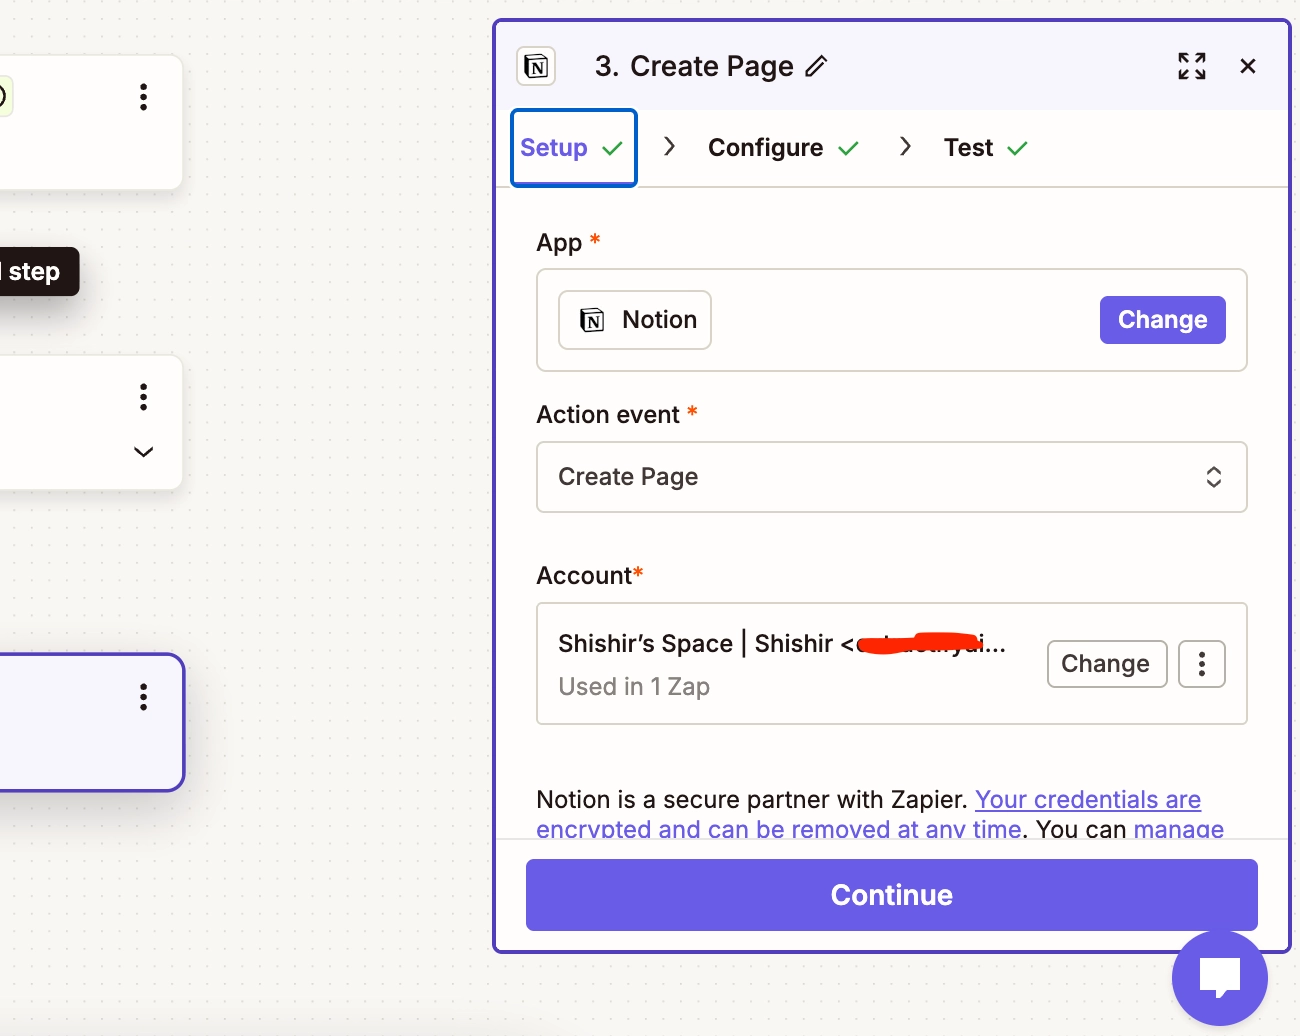
- Click + Add step and select Notion.
- Choose the action Create Page.
- Connect your Notion account and select the destination page or database.
Next, map the meeting data into the page. Zapier provides a field picker; click into each box and select the corresponding piece of meeting data. Nothing is entered manually.
Every italicized field above is selected from Zapier's field list rather than typed manually. If timestamps appear in a raw format like 2026-08-28T05:46:50Z, Zapier's Formatter step can clean them up. Choose Date / Time, provide the start time, and select your preferred format. This step is purely cosmetic and can be skipped if the raw format isn't a concern.

5) Turn it on
Click Publish. The integration is now complete.
Send one more test event to confirm a page is created in Notion end to end, then delete the sample page. From this point forward, the automation runs on its own.

How it works, in short
- Your meeting ends
- TeamsMaestro generates the summary
- The webhook fires and Zapier receives it
- The Notion page is created
Four steps, none of which require manual input. The same first three steps apply if you swap Notion for Slack, Sheets, or your CRM.
Troubleshooting
One last thing
Every webhook includes a signing secret, available on its detail screen. It isn't required for a Zapier setup like this one; it exists to let developers verify that a message genuinely originated from TeamsMaestro rather than an impersonator. If you're integrating with your own internal systems, your engineering team will know how to put it to use.
Start with one simple workflow, test it with a recent meeting, and refine your filters as you go. Once everything is working as expected, you can build more automations around the way your team works.
Languages we support
TeamsMaestro currently supports a wide range of languages for meeting summaries, transcripts, and AI responses — from English and Spanish to French, German, and many more. Our goal is to make every team’s communication experience seamless and inclusive, no matter the language.


If your preferred language isn’t supported yet, we’d love your feedback! Email us at feedback@maestrolabs.com to request new languages or share examples of what you’d like to see. Your input helps us shape the next updates of TeamsMaestro.
Final thoughts
Meeting summaries are no longer one-size-fits-all. With the Language and Template buttons in TeamsMaestro, you can create tailored, polished notes in seconds. Use these tools to communicate clearly, reduce follow-up work, and keep everyone aligned, wherever they are and however they work.
Languages we support
MailMaestro currently supports a growing range of languages for composing, summarizing, and improving your emails. From English and Spanish to French, German, and beyond — we’re expanding our capabilities to make AI communication accessible for everyone.
If your preferred language isn’t available yet, we’d love to hear from you! Email us at feedback@maestrolabs.com to request new language support or share specific examples. We’re continuously improving with your input.