How to install MailMaestro's Outlook AI for your organization
Integrate the power of MailMaestro's Outlook AI into your organization with just a few easy steps. As a Microsoft Admin, you can make MailMaestro accessible not just to everyone in your organization, but also to specific teams or individuals based on your needs. Here's a simplified guide on how you can do it:
1. Navigate directly to the Integrated Apps page on Microsoft Admin by clicking this link: Integrated Apps.
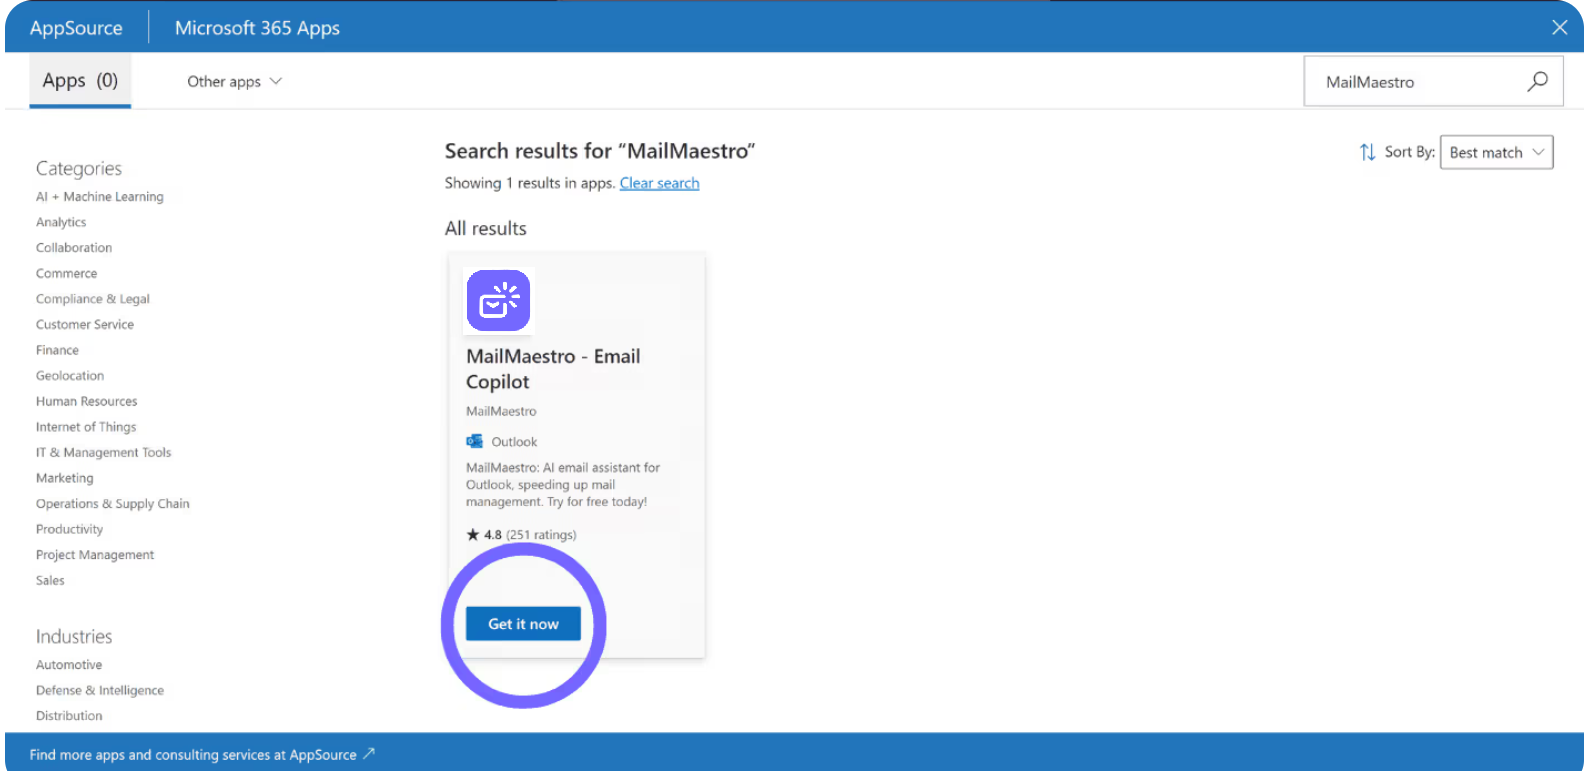
2. Once you're on the Integrated Apps page, click on Get apps to open a new window where you can find MailMaestro.

3. In the new window, use the search bar on the top right to find MailMaestro. Click Get it now once it appears in the search results.
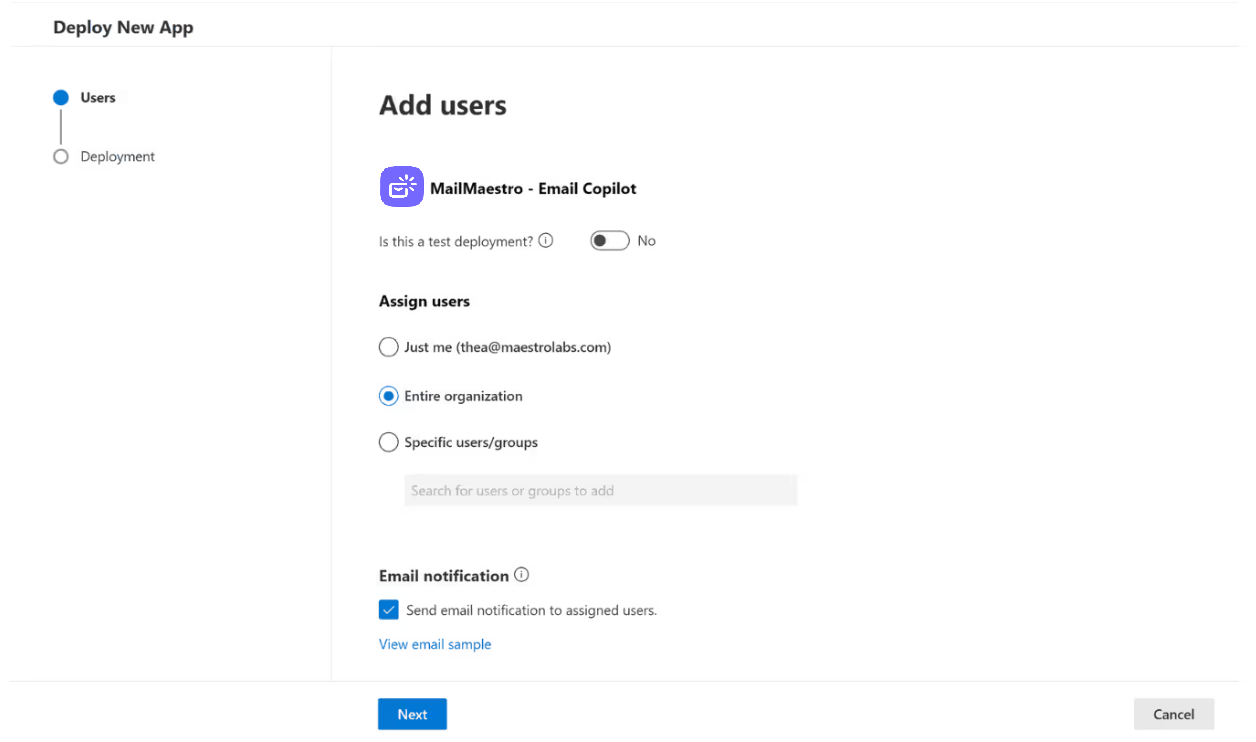
4. You'll then have the option to test the deployment or proceed without the test. Make your choice accordingly.
5. Assign the users you want to grant access to MailMaestro. You can deploy MailMaestro for yourself, for your entire organization, or for selected specific user groups. For instance, if you want to launch a pilot, we recommend creating a group and assigning it there.
6. If you choose to launch for your entire organization, click on Entire organization then Next.
7. Review the permissions that are presented to you, and if all is in order, click on Next.
8. Complete the process by clicking on Finish deployment.
9. We recommend you communicating to the selected users that the tool will now be available in their Outlook next time they restart the app.
With these easy steps, you can bring the power of MailMaestro's Outlook AI to your entire organization. It's time to revolutionize your email productivity!
If you need more guidance, check out our detailed demo below:
For any questions or issues, reach out to our team at feedback@maestrolabs.com. Let's revolutionize your email productivity with MailMaestro!
Languages we support
TeamsMaestro currently supports a wide range of languages for meeting summaries, transcripts, and AI responses — from English and Spanish to French, German, and many more. Our goal is to make every team’s communication experience seamless and inclusive, no matter the language.
If your preferred language isn’t supported yet, we’d love your feedback! Email us at feedback@maestrolabs.com to request new languages or share examples of what you’d like to see. Your input helps us shape the next updates of TeamsMaestro.
Final thoughts
Meeting summaries are no longer one-size-fits-all. With the Language and Template buttons in TeamsMaestro, you can create tailored, polished notes in seconds. Use these tools to communicate clearly, reduce follow-up work, and keep everyone aligned, wherever they are and however they work.
Languages we support
MailMaestro currently supports a growing range of languages for composing, summarizing, and improving your emails. From English and Spanish to French, German, and beyond — we’re expanding our capabilities to make AI communication accessible for everyone.
If your preferred language isn’t available yet, we’d love to hear from you! Email us at feedback@maestrolabs.com to request new language support or share specific examples. We’re continuously improving with your input.
Frequently Asked Questions


